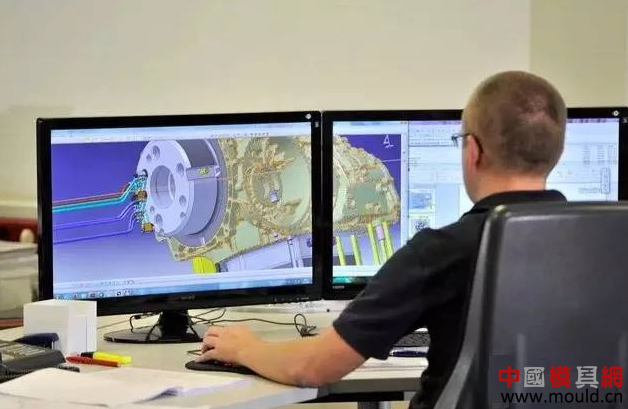
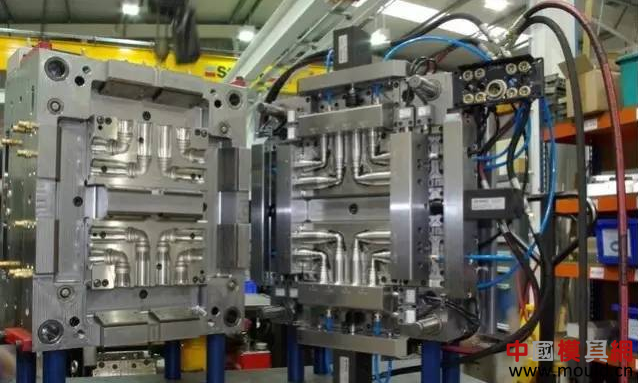
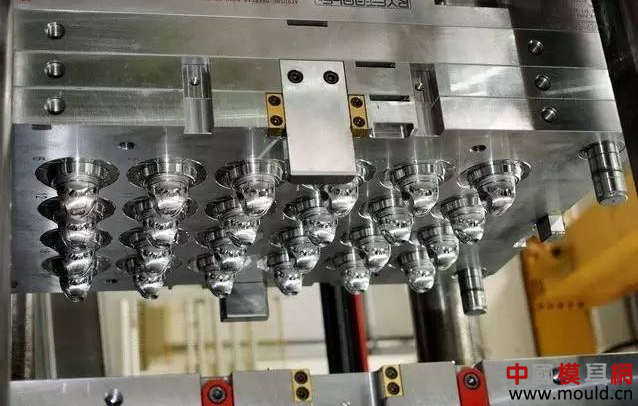
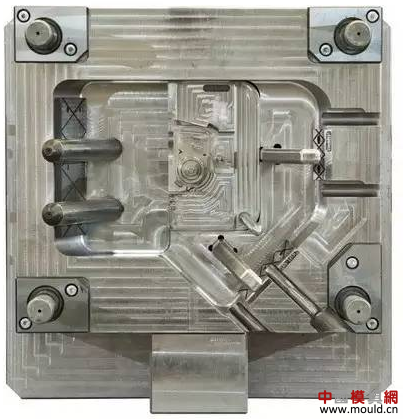
In the past ten years, I have conducted in-depth study and inspection in a number of mold manufacturing factories in Japan, which has accumulated more than six months. After comparison, Toyota's mold technology is also very prominent in Japan's mold manufacturers, no matter its ability, efficiency and technology are the world's leading level. Through the understanding of Toyota, we can see that the world's automotive mold manufacturing technology is developing in these directions: the operation in front of the computer gradually replaces the on-site operation, replacing the manual labor with high-precision machining, and the design and manufacture of the mold is highly standardized, one piece. Production methods are developed to streamlined production methods and so on. Combined with our domestic mold manufacturing situation, Toyota is very different from us in the following places, which is worthy of our good reference. Fine die face design The mold design we often say is actually divided into three parts: stamping process design, die face design and structural design. The content and focus of these three designs are completely different. Toyota's workflow is to design the stamping process first and then to guide the die face design and die structure design, which are made by different people, and the professional division of labor is very clear. The traditional stamping process design uses process diagrams or dl diagrams. Its die face design is very rough. The process modeling under the guidance of such drawings must be supplemented by manual trimming and manufacturing processes in the subsequent order, resulting in mold manufacturing. The artificial forceps have a large amount of repair and a prolonged period. At the design stage, Toyota completed the fine design of the die surface through the surface modeling of the computer. For example, different drawing ribs are designed for different feeding amounts, and the draw rib sections of different parts of the same set are different, anti-rebound, over-draw processing, minimum pressing surface design, convex and concave mold unequal gap design, and the like. The result of the fine die face design can greatly reduce the profile processing, reduce the fit repair, and reduce the trial work time, its role is very small. In contrast, the domestic mold design is still in the structural design stage, the die face design is not well received, the die face is actually completed by the day after tomorrow, and the backwardness of the mold design has caused the backwardness of manufacturing, it is no surprise. . 2. Application of sheet metal forming analysis technology From 5-6 years ago, Toyota began to use the finite element method to do computer simulation sheet metal forming analysis. The main application software was dyna3d in the United States. After nearly three years of hard work, they reached a practical level. At present, Toyota has established a library of analysis results for various typical parts of the entire body. For a new model, if the formability does not change much, just refer to the original process and do not analyze, only the special new shape is used for sheet metal forming analysis. Toyota's new car is to be sampled, and in addition to sheet metal forming analysis, it is necessary to do simple mold verification. Therefore, Toyota people believe that the current sheet forming analysis is not a necessary and simple matter, whether it is cycle or cost. I believe that Toyota's model development is very large, there is little change between the models, a lot of similar pieces, and accumulated a wealth of people's experience, sheet metal forming analysis does not use much, it is a good to build an analysis result library Method (Japan Fuji Mould Co. also did this). On the other hand, the domestic status quo, on the one hand, the professional division of the mold factory is very low, all kinds of pieces will be encountered, it is difficult to have ready-made experience, it seems more need for sheet metal forming technology. On the other hand, the low level of technology supports poor environmental conditions (eg, sheet material parameters, friction coefficient, etc.), and it is very difficult to use it in a mold factory to achieve practicality (not to mention the effect, not to mention the cost). Even if a professional analysis company is established, considering the factors such as the number of users, the cycle, and the price, I am afraid that it will be high and low. At present, the practical application effect of this technology in China is still difficult to determine. 3. Die surface design experience accumulation mechanism In addition to hand-drawn sketches, Toyota's design department has been fully computerized. The general designer has a laptop in addition to a workstation. However, the truly creative design relies on the human brain, especially on the experience of people. Toyota particularly emphasizes the experience accumulation mechanism: only collective experience can not have only personal experience, such as: unified management of data, group discussion of sketch design, multi-sector collective review of drawings, design standards, regular changes of specifications, etc. . The experience accumulation mechanism is the main means by which Toyota can continuously improve the fine design of the die face. For example, after the mold processing is completed, the general mold surface does not need to be combined, the cutting edge does not have to be gap, the fitter is only responsible for the installation, and the mold cannot be trimmed at the initial test mode. The mold has the mold surface designer present, the initial test mode Defects need to be recorded. The final rest results, such as the drawbead, the variation of the drawbead, the asymmetry of the symmetrical parts, etc., are also measured on site. The accumulation, collation, analysis, and archiving of these materials are all accumulated experience of the mold design, and are ready to be added to the next design. Toyota's mold design and commissioning process is truly a closed-loop manufacturing system. With this self-improving experience accumulation mechanism, the design of the mold is more and more precise and more accurate. 4. Gap diagram design In Toyota, the die face design is actually done by both surface modeling and nc programming. In order to convey and describe the die face design idea, a third figure other than the dl diagram and the die diagram is generated. The figure is also called the quality assurance chart. The gap map I have not seen before, this may be a creation of Toyota. The design of the mold is not just to design a machine, it can complete its certain action (this can only be called structural design), the ultimate purpose of the mold design is to ensure that the product parts it is pressed are qualified high quality. The gap diagram is such a diagram designed to ensure the quality of the product. In the quality assurance chart, it mainly includes such items as: the actual shape area of ​​the mold, the gap value of each type of area, the change of the mold surface required by the process, the change of the draw fillet, the hollowing out of various mold faces, etc. Wait. Any die face design that cannot be realized by surface modeling is realized by the design of the gap diagram and by the design of nc programming. Here, nc programming is no longer simply processing the mold structure, and it actually participates in the die face. The design is coming. Therefore, the application of the gap map is also a necessity of fine die design. 5. How to adapt to the requirements of large-scale production Improve material utilization: For high-volume automotive production, increasing the utilization of sheet material is the first major issue in mold design. As long as the material utilization rate is increased by a few percentage points, the cost of the mold can be neglected. If a set of molds is 400,000 yuan, which is equivalent to the price of 100 tons of steel plates, and the life expectancy is 500,000 pieces, the average saving of 0.2kg steel plates per piece can save the cost of this set of molds. Reducing the stamping process: the trend of mold design is the combination of parts, the clamping of the left and right symmetrical parts, the clamping of the front and back sequential parts, etc. The original pieces are combined into one piece, the different pieces are combined in one set, the mold is getting bigger and bigger. The single-piece process is greatly reduced, and the number of complete vehicle molds is decreasing, which plays a key role in reducing the cost of stamping. For example, Toyota reduced the mold factor of the entire vehicle to about 2 from the past 3 to a few. Stamping automation: In order to fully automate the press line, the mold must consider the mechanical hand cutting, automatic discharge of waste, pneumatic, automatic and sensing devices are generally used. Quick replacement of the mold: the mold change time of the press line has also become a problem that must be considered in the mold design. For example, the drawing die completely replaces the double action with a single motion, the mold is automatically clamped, the die is not changed, and the ejector pin is not changed. 6. Design and processing of mold structure Design has two purposes: one for design itself and one for manufacturing. The designer gradually perfects his own design ideas in the process of drawing. After the drawing is finished, he is also clear about himself. Therefore, the drawings must first be designed by the designer himself and make the design work more efficient. On the other hand, the design is oriented towards manufacturing, with the ultimate goal of increasing production efficiency. We should recognize that different production processes determine the form of the drawing. The traditional mold assembly drawing and the form of the part drawing are adapted to the mold production of the non-frame structure. After the large-scale CNC milling, the mold assembly diagram becomes a better form. After the cad design is fully applied, if the production method has not changed, then the 2D design and the general design will not change, just replace the board with the screen and keyboard. In 1997, our company changed the 2D design to 3D solid design. However, the effect was not good, the design efficiency was reduced, and there was not much benefit in production. Toyota has provided us with a relatively successful experience in the close coordination of cad 3D solid design and manufacturing. 1 Physical design Toyota's mold design has all adopted 3D solid design, and the application software is enginner. Separation of die face design and structural design: Toyota completely separates the die structure design from the die face design. The former is a solid design and the latter is still a curved surface design. In the structural design, the die face is only schematic and can be used for real machining and cannot be used for mold processing. This division of labor greatly simplifies the physical design of the mold, which is important for the success of 3D solid design. Cancel 2D drawings: Dimensions account for about 40% of the drawing workload. Toyota does not draw 2D drawings in the traditional sense, which completely eliminates the workload of this part. Instead, according to the needs of each process, the necessary three-dimensional stereograms are given, and a planar sketch of the necessary dimensions is marked. If you start from the 3D design and finally get the result of the 2D map, then transforming a 3D solid into a 2D map that conforms to the habit of people's drawing will be very time consuming and laborious, and the designed entity becomes worthless. Obviously contrary to the original intention of the physical design, Toyota's success is not to do so. Building blocks and editorial design: The 3D solid design adopts the building block design, relying on the 3D standard parts and the typical structure library to make the mold structure greatly standardized, and the 2D drawing concept is a three-dimensional arrangement. At the same time, a large number of existing similar mold structures are borrowed, and the new mold design is completed after simple editing and modification. For the designer, this is a revolution in concept. If you still stick to the rules, first draw a plan to regenerate the body shape, then the advantage of the three-dimensional design becomes a burden, and the efficiency is too low. Interference check: In the two-dimensional design, the designer does not really establish a three-dimensional mold image. The complex space problem can only rely on the sectional view. Once the experience is insufficient, the space interference will be inevitable. The most direct benefit of 3D solid design is the very intuitive and convenient interference check, even for motion interference analysis. In the past, a difficult problem in the design of 2D drawings was solved in the face of physical design. The complexity of the physical design is simple: the physical design is directly oriented to manufacturing, and the complexity of the design is determined by the processing needs, regardless of the human viewing habits. For example: chamfering of castings, the concave angle is done by the cutter during machining, and the lobes are manually trimmed, so it is not necessary to do it in the design; for example: standard parts, completely purchased parts, can also become schematic in design Simple geometry and so on. There are also a lot of design work, which is actually done by the subsequent process specifications, such as screw hole position, insert shape and so on. Designed for processing needs is the most economical design. Semi-automatic design: Based on the physical design of Toyota, Toyota has developed some auxiliary programs with certain functions, such as drawing die, which are typical and highly standardized. For example, the design of the drawing die structure is generally handed over to the novice, female staff to complete, and it takes less than a week to design a set of models. 2 Real CNC machining The first use of the physical design is that the casting foam is completely CNC machined. Toyota's real model is machined from a single piece of rectangular foam. The real-time NC machining production is through the process editing of the solid model (such as: machining surface processing allowance, model layer editing, etc.), then through NC programming, foam blank blanking, CNC machining, manual bonding and Trimming and other several processes are completed. In Toyota, the real production staff has completely changed from manual production to a large number of CNC programming. The simple manual bonding and finishing work on site is played by temporary workers. The real-time numerical control production directly benefits the physical design, and improves the precision of the casting, which brings great advantages for the subsequent fine processing. 3 Construction surface CNC machining The mold construction surface is the machined surface other than the mold surface, such as: guide surface, insert mounting surface, screw hole, other surface to be processed, and so on. These are also processed by CNC in CNC. The physical design brings the possibility of CNC programming of the construction surface of the mold. The programming of the structural surface can greatly improve the machining efficiency, reduce the human error in the field, and improve the automation of the processing. Of course, to do this, in addition to the physical design, there is still a lot of work, such as: automatic tool setting, tool management, processing parameters, programming experience, etc., the gap between us and Toyota is even greater, without these foundations. The programming of the construction surface is impossible. Through the physical design, Toyota truly integrates the cad/cam on the mold structure, and only integrates it. It eliminates the constraint of drawing the two-dimensional map, and the physical design shows its value. The two should be developed in a timely manner. This is the experience that Toyota has provided us. 7. Vigorously develop high precision die surface processing technology 1 High precision machining of profiles The high-precision machining of the profile is mainly reflected in the following aspects: improving the precision of the die face machining, improving the degree of machining in place, and achieving the fine design of the die face. In addition to the precision of the machine tool and the management of the tool, high-precision machining is mainly achieved by the improvement of programming technology. The processing method includes contour line processing, maximum length forward machining, finishing shift density of 0.3 mm, and high-speed machining with a vertical knife angle of 30 degrees to improve machining accuracy. At the same time, in the concave corner cleaning root, the convex fillet processing in place, the control of the mold unequal gap, the largest possible reduction of the contour surface must be processed in place to achieve the fine processing of the mold surface. 2 High-precision machining of two-dimensional cutting edge Toyota's two-dimensional cutting edge insert processing is carried out on a dedicated insert processing line. The machining accuracy can be achieved by pin positioning and assembly, and the clamping does not require a gap. When the two-dimensional cutting edge is integrally processed, the on-line measurement method is also used to ensure the clamping gap of the convex and concave mold. The maximum precision of the two-dimensional cutting edge is that the trimming burr of the workpiece can be well controlled. 3 High-precision machining effect Through high-precision machining, Toyota has achieved the goal of reducing the accuracy of the mold to a small fitter and no fitter. In Toyota's standard plan, there are only seven fitter working days between the completion of the machining and the first test, which is basically the fitter assembly time, and there is no fitter repair time. In Toyota, once the mold is finished, basically no need to trim the fillet, no need to open the gap, no need to repair the root, no cutting edge, no research, even the profile of the drawing die does not need to go to the knife mark, not to grind, the only The nipper repair is to use a whetstone to grind the draw crown and the draw draw surface. Moreover, the first test mode, the test piece without the need to repair the test piece pass rate of more than 80%. If it is not easy to see with your own eyes, this is the power of fine die face design and high precision machining. 8. Other technologies 1 Mold material Toyota's drawing die materials mainly use ductile iron instead of the alloy cast iron currently popular in China. Ductile iron has good weldability, machinability, wear resistance and surface hardening hardness, and the cost is much lower than that of alloy cast iron. The trimming edge material is made of profile inserts instead of the cast steel, which is mainly because the cost of cast steel is much higher. Most notably, Toyota has already used a large number of special cast iron materials with integrated base and cutting edges as trimming molds, which greatly reduced the machining cost of the mold. Please note that the cutting edge here is neither surfacing nor steel. The whole cutting edge of cast iron is only used for surface quenching and is directly used for thin sheet trimming die with several hundred thousand life. Moreover, the cost of such castings is not high. 2 Surface treatment The surface treatment of Toyota's drawing surface requires higher plating, and other molds, flanging and trimming inserts are basically flame-quenched. Japan does not currently use ion nitriding technology. According to Toyota people, there are also trial considerations. For the long-life cutting edge material of thick sheet, Toyota uses a special steel with its own patent, which is also flame quenching. The method of first forming and then quenching the whole, the deformation caused by quenching can only be manually trimmed, and it is not seen in Toyota. 3 Inspection in mold production The mold is a one-piece production, and it is very difficult to ensure the quality. The domestic mold factories are mostly equipped with a large number of full-time quality inspection personnel, which seriously affects the production efficiency, but the quality control effect is still not good. How did Toyota do it? Process inspection: Toyota people believe that the quality of the product is at the source. Design, technology, programming, machine tools and tools are the real guarantee of quality. The quality is produced rather than checked out. Therefore, there is no full-time inspection between the molds. Only self-inspection and mutual inspection, the quality of the key depends on each producer. Profile inspection: There is basically no measurement inspection of the mold profile. A large number of profile inspections, such as the measurement of the fillet, the correction of the drawbead, the smoothness of the surface, etc., are mainly for the experience of the die face design, rather than to verify the quality of the die. Parts inspection : Toyota's product parts inspection, mainly rely on 3D measuring machine for automatic numerical detection, but they also do the inspection tool, the inspection tool only plays the role of product positioning support. Therefore, the structure of the inspection tool is simple, there is no forced clamping device, and the detection of their product parts is almost in the free state, which is a very strict requirement for the conformity of the product parts. 9. Trends in technology development A few years ago, we saw that the automotive mold industry in developed countries seems to be shrinking. Because at that time, mold production was inseparable from human manual labor, developed countries had high wage costs, no one was willing to do this, and so on, the mold industry has a tendency to shift to the third world. Through the development of Toyota, we have some new understandings. Mold production is increasingly dependent on high technology. It can completely reduce artificial labor. The most important demand for mold production is high quality and short cycle. In the production of large-scale cars, the cost of the mold itself is far less important than the cost of using the mold. From this point of view, at present, our mold production does not have any advantages, this kind of industrial transfer will not become a trend. For more than ten years, the technological progress we have gained through the introduction of hardware technology has not been made up for people’s Efforts to pursue new gaps in technological progress. To put it another way, if the automobile mold industry really shifts to the third world, it must be a sunset industry. At present, there is still a certain development space and demand for automobile molds without breakthrough changes in body materials. 1 Focus on developing computer technology The focus of Toyota's mold manufacturing technology development is to highlight the application of computers, and more and more people are moving from the production site to the front of the computer. Solid design plus CNC programming replaces manual real-world production and machine operation. The fine die face design and fine CNC programming greatly reduce the clamping repair, and the high precision machining eliminates the grinding and repairing of the die. Now CNC programmers have surpassed the on-site operators. The man-hour cost of NC programming exceeds the machining time of the machine tool by 50%. The programming cycle exceeds the machining cycle. The development of computer technology applications has not reduced the cost of molds, but the production of molds has shifted from relying on human skills to CNC automatic and semi-automated production. This high-precision and unmanned processing has made the quality of molds and products. Greatly improved, the production cycle has been greatly shortened, and computer technology has brought mold manufacturing technology to a new level. Comparing it, it can be seen that the current computer application in China is still relatively primitive. It is not that our machine tools and software are not working, but there is a big gap in the basic technology of application. Even if Toyota’s technology is fully moved, the real It is not an easy task to do that. 2 Destroy the fitter It turns out that we think that it is impossible to leave the manual by the single-piece production and the complicated product of the mold, and Toyota proposed to eliminate the fitter. Eliminating the fitter is a goal, mainly to greatly reduce or completely avoid grinding and adjusting the fitter (the assembly fitter still needs). As we mentioned earlier, Toyota’s current goal has been basically achieved. Except for the grinding and drawing and the rounded corners, the grinding, repairing and adjusting the tongs have been mostly abnormal or tonic. Defects in design and manufacturing are no longer a necessary and normal job. Let us give you an example. The smoothness of the model surface has always been the quality standard we emphasize. In the past, it was mainly done by the fitter. In order to reduce or not to grind, it is necessary to reduce the margin of milling cutters. Some people advocate the use of vertical-face machining of five-axis milling machines, as well as the use of CNC-type surface grinding. These Toyotas have also been used, but practice has proved that five-axis machine tools are costly and inefficient, programming is very difficult, and the effect is not ideal. Finally, Toyota uses a high-speed, small-shift three-axis milling method to obtain a high-precision profile, which is manually ground and rounded, while other profiles are simply not ground, and the die face is pulled with a knife mark. The result proves that although the mold surface can not talk about the smoothness (and the knife mark), even the outer panel of the car with high surface quality requirements has no pull marks on the inner surface of the workpiece, and there is no outer surface for the useful parts. Any adverse effects are those that need to be plated, as well as with knife marks. It is said that some automotive mold factories in Germany and the United States have long since abolished the profile grinding. This is a big joke for those who are pursuing the surface finish of the mold. Similarly, the concave surface of the profile adopts a clear loss, the vertical surface processing adopts a 30-degree head anti-knife, and the unequal gap is used to control the molding pressure of the workpiece, etc., and now the precision of the convex-concave mold is lost, so that the grinding and clamping repair are lost. significance. Therefore, the elimination of fitters in a certain sense is no longer a dream. Of course, in China, how a mold factory can convince users to accept such a tool with a knife mark is still a big issue. 3 Integrated processing At Toyota's machine shop, there are three CNC machining lines: the first is a machining line consisting of several interchangeable CNC machines. One line includes bottom machining, horizontal milling, rough milling and finishing milling. The machine tool has a clear division of labor. It is not necessary to re-install the machine when the workpiece is changed to the machine. This assembly line is about the products of the 80s. The second is a group of unmanned sturdy processing machines with a three-dimensional warehouse, which was the product of the early 1990s. The third type is a high-precision, high-precision, five-face machining center that has been put into use in recent years. The first processing line, its single machine is the CNC machine tool we are currently using, but the machine tool is a multi-work bench, it is very efficient in not re-installing the card, and we basically stay at the level of single machine operation. It is worth learning from. For the processing machine group, although it is very advanced, it is very difficult to operate, preparation work and time is very long. If there is not a lot of finishing tasks, it is not practical to use. It is also the same in Toyota. It seems that this is not a success. The direction. The integrated machining center is the latest technology that is currently being developed. Its advantage is that it combines the advantages of various machine tools. In addition to the bottom surface processing, it is installed once, rough, fine, lying, high-power, high-precision, high-speed, all-round. The 18th class martial arts are well-versed and the processing efficiency is very high. The disadvantage is that the cost of the machine tool is very high, and the environmental requirements are also very high. Is it economical to use it to work hard and work together? Still not known. However, this is undoubtedly a very idealistic technology, representing the development of CNC machining technology, should attract our attention. Toyota's technology tells us Good molds should be designed; molds can also be produced in assembly lines; high-tech applications are the driving force behind the development of mold manufacturing technology; there is still a gap between the domestic automotive mold industry and the world's advanced level. If we don't work hard, this gap is not narrowing. But it will widen. Through the above, we just listed some of the impressive and contrasting things that Toyota has seen in the country. It is not comprehensive and detailed. I hope these materials can be considered by the peers.
Propan-1-ol is a primary alcohol with the formula CH3CH2CH2OH and sometimes represented as PrOH or n-PrOH. 1-propanol Sds is a colorless liquid and an isomer of 2-propanol. 1-propanol C3h7oh is formed naturally in small amounts during many fermentation processes and used as a solvent in the Solvent Raw Material pharmaceutical industry, Sodium Hexametaphosphate mainly for resins and cellulose esters, and, sometimes, Titanium Dioxide as a disinfecting agent.
N Propanol Buy is thought to be similar to ethanol in its effects on the human body, but 2–4 times more potent. Oral LD50 in rats is 1870 mg/kg (compared to 7060 mg/kg for ethanol). It is metabolized into propionic acid. Effects include alcoholic intoxication and high anion gap metabolic acidosis. As of 2011, one case of lethal propan-1-ol poisoning was reported.
N-propanol Cas 71-23-8 has high octane number and is suitable for engine fuel usage. However, propanol is too expensive to use as a motor fuel. The research octane number (RON) of propanol is 118, and anti-knock index (AKI) is 108.
1-propanol Sds,1-propanol C3h7oh,N Propanol Buy,N-propanol Cas 71-23-8 HENAN LIHAO CHEM PLANT LIMITED , https://www.lihaoche.com